
Your Apple ID is your gateway to your iPhone. It lets you access tons of online features, like the App Store, Apple Music, Apple Photos, and more. It also offers many security features. For example, you can use it to put your iPhone in “Lost Mode” if you ever lose it. This prevents others from gaining access to it.
However, these security features can also sometimes become a pain. For example, if you ever forget your Apple ID and passcode yourself, you might be locked out of your iPhone. As you read this post, we know you’ve found yourself in a similar situation and want to bypass your Apple ID now.
But how do you do that? Is it even possible to bypass Apple ID? Is it hard to do? Look no further; this article will cover everything you need to know about this subject. By the end of this post, you will know multiple methods to bypass your Apple ID on your iPhone or iPad.
Sounds good? Let’s dive right into it.
Way 1. Bypass Your Apple ID By Resetting Password
Luckily, there’s a built-in method you can use to reset the password of your Apple ID. For this method, you will use your iPhone’s passcode to reset your Apple ID’s password.
Here’s how to bypass Apple ID by resetting your password.
- Open the Settings app on your iPhone.
- Tap your Apple ID at the top.
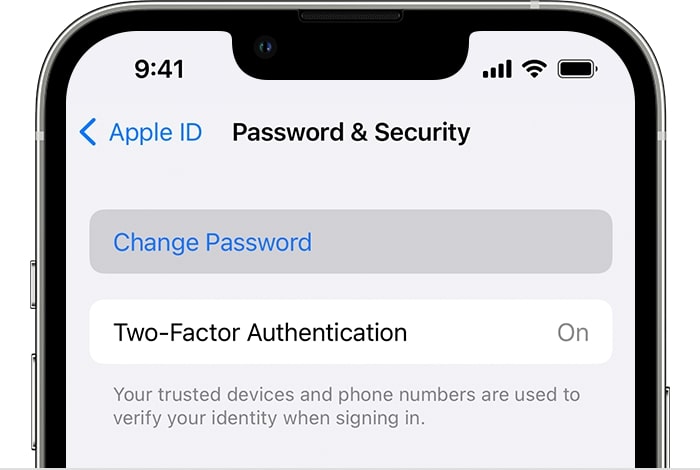
- Tap “Password & Security.”
- Tap “Change Password.”
- Enter your iPhone’s passcode.
- Enter your new password twice and confirm.
Your Apple ID password will now be changed. You can now use the new password to log in to new devices or log out of existing Apple devices.
Way 2. Bypass Apple ID with a Professional Tool
The best way to go about the situation is to use a professional third-party iPhone passcode unlock tool for the job. With Tenorshare 4uKey, you can easily bypass the Apple ID and passcode on your iPhone.
Using Tenorshare 4uKey, you can completely reinstall the iOS system on your iPhone, which will remove your Apple ID and passcode from the device. After the process is complete, you will end up with a brand-new iPhone without Apple ID or passcode.
If you have Find My turned OFF on your iOS device, the process is even easier. Let’s get that out of the way first below. Note that it works in all iOS versions. All you need is Find My turned OFF.
- Download and install Tenorshare 4uKey on your computer.
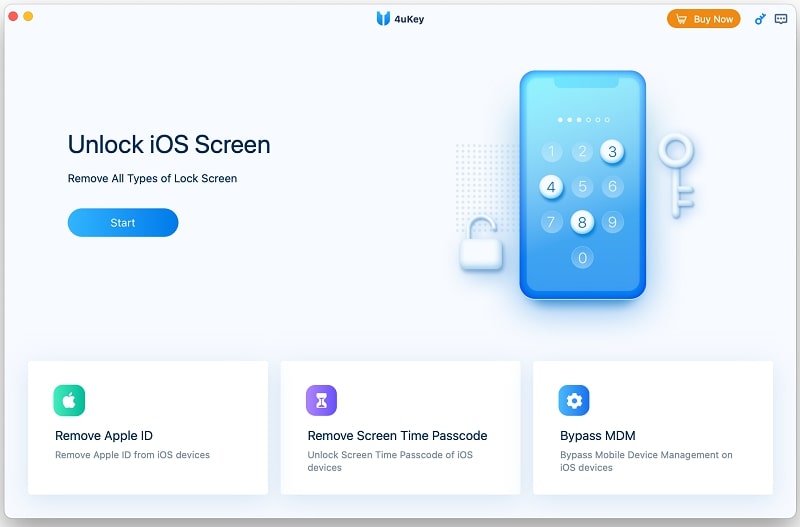
- Open the program.
- Click the “Remove Apple ID” button.
- Now, connect your iPhone to your computer using a USB cable.
- Unlock your iPhone using your passcode or Face/Touch ID, then tap “Trust.” Enter your passcode again.
- Click the “Start Remove” button, and the Apple ID will be removed in a few seconds!
Now, if you have Find My turned ON on your device, the process mentioned above won’t work. You will have to reinstall the iOS system for it to work completely. Furthermore, it’s essential that you have a screen passcode set up and Two Factor Authentication turned ON.
Don’t worry; we will guide you through all that below.
Here are the steps you need to follow.
- If you don’t have Screen Lock on your iPhone, do it now. Go to Settings > Face ID & Passcode > Turn Passcode On. Then, click Yes on 4uKey’s interface.
- If you don’t have 2FA enabled on your iPhone, do it now by going to Settings > Apple ID > Password & Security > Two-Factor Authentication. After you have turned it ON, click “Yes” on 4uKey’s interface.
- Now, you need to download the latest iOS firmware package for your device. This package will be installed on your iPhone to completely factory reset it. Click the “Download” button to begin the download. It may take some time to download based on your connection speed. So, grab a snack while this completes.
- After downloading the firmware package, it’s time to install it. To do that, click the Start Remove button. Then wait for the installation process to complete.
- When your iPhone boots up, start the setup process. When asked to enter the Apple ID credentials, tap “Unlock With Passcode.” Then enter the passcode you set up some time ago, and you’re good to go!
Way 3. Bypass Apple ID Via the Previous Owner
If the Apple ID on your iPhone is not your own, the situation could be a bit more challenging.
There are numerous ways people end up in this situation. Most of the time, it happens when you buy a used iPhone and the previous owner doesn’t remove their Apple ID before giving it to you.
If you’re in a similar situation, the best way to resolve the issue is to ask the previous owner. Ask them to remove the said iPhone from their Apple ID.
Before they start the process, you need to turn OFF the iPhone. This is important because they won’t see the option to remove the iPhone from their Apple ID until it’s turned OFF.
After you turn OFF the iPhone, they need to follow the steps below.
- Open icloud.com on your computer browser.
- Log in to your Apple ID.
- Click the “Find My” app.
- Select the “All Devices” dropdown menu and select the iPhone in question.
- Select “Remove from Account” and confirm.
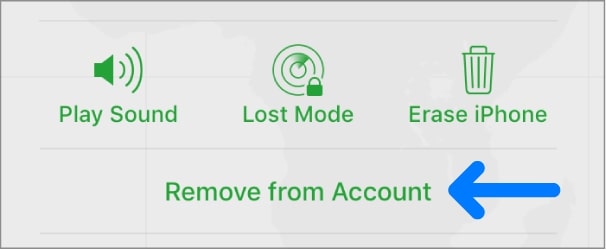
Your iPhone will now be removed from their Apple ID.
Way 4. Bypass Apple ID Via iTunes
If Find My is turned OFF on your iPhone, you can restore it using iTunes on Windows or Finder on Mac. By doing that, you can reinstall the iOS system on your iPhone, which removes the Apple ID.
Before you begin, make sure you have iTunes installed on your Windows PC. You can get it from the Microsoft Store. If you’re using a Mac, you don’t need to do this step, as you will use Finder instead.
Then, follow the steps below.
- Connect your iPhone to the computer using a USB cable.
- Open Finder on Mac or iTunes on your Windows computer and select your iPhone.
- Enter Recovery Mode on your iPhone. To do this, press and release the volume up button, press and release the volume down button, then press and hold the side button until you see the Recovery Mode screen.
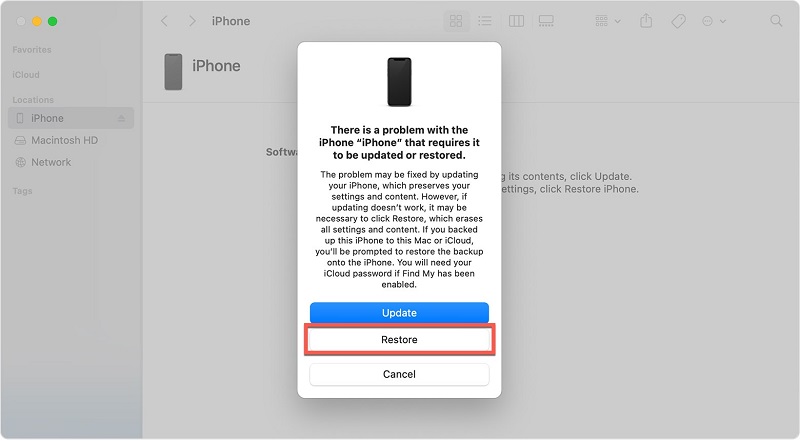
- You will see a message on your Finder or iTunes stating something is wrong with your iPhone and needs restoration.
- Click “Restore.”
- Complete the on-screen steps to complete the Restore process.
- Now, your iPhone will be reset, and you will see the setup screen. Set it up like you set up a new iPhone.
Way 5. Bypass Apple ID via iCloud DNS
iCloud DNS method is one of the advanced methods to bypass the Apple ID.
It works by manipulating the servers your iPhone communicates to authenticate Apple ID.
Sounds too good to be true? That’s because it is. There are numerous cons to using this method.
For example, you can never guarantee that it will work. It may or may not. It especially doesn’t work on the recent versions of iOS because of tighter security. It’s more viable on older iPhone models running outdated iOS versions.
Plus, even if it works, you can’t use all of the features of your iPhone. The functionality would be very limited.
Here are the steps you need to follow to make it work.
- Turn ON the iPhone and start the setup process.
- On the WiFi setup screen, tap the “i” icon next to your WiFi connection.
- Tap “More WiFi Settings.”
- Now, you need to enter a new IP in the “DNS” section. You can choose one of the following addresses based on your location.
- USA: 104.154.51.7
- South America: 35.199.88.219
- Europe: 104.155.28.90
- Asia: 104.155.220.58
- Australia and Oceania: 35.189.47.23
- Other continents: 78.100.17.60
- Now, connect to that WiFi and go back.
- On the “Activate iPhone” screen, tap “Activation Help.”
- Go back, and Activation Lock will now be bypassed!
Be noted that this method is very unreliable. So, don’t keep your hopes high going into it.
Frequently Asked Questions About Apple ID on iPhone/iPad
Can Apple ID be bypassed?
Yes. You can bypass your Apple ID on your iPhone using one of the methods mentioned above. However, not all methods are equally reliable. For example, the iCloud DNS method is the least reliable out of them all. If you want the best possibility of getting around the Apple ID, Tenorshare 4uKey is your best bet.
Is it legal to bypass Apple ID?
Yes. It’s completely normal to try and bypass the Apple ID. However, this only applies when you bypass it on your own iPhone. You should never try these methods on someone else’s iPhone, like someone’s lost iPhone.
Can Tenorshare 4uKey help me if I don’t remember my passcode?
Yes! Tenorshare 4uKey is also very helpful when you’ve forgotten your iPhone’s passcode. It has a separate feature you can use to bypass the screen lock.
The Bottom Line
There you go! That’s how to bypass Apple ID on your iPhone.
Remember, Tenorshare 4uKey should be your top priority if you’re looking for the most successful method for the job.
On the contrary, if you don’t want to waste time, we recommend you completely avoid the iCloud DNS method, especially if you have iPhone X or later.
